This Guide Is An Effective Way To Set Up A TrustLine with XRPayNet’s app Volta
1) Download or open your Volta App
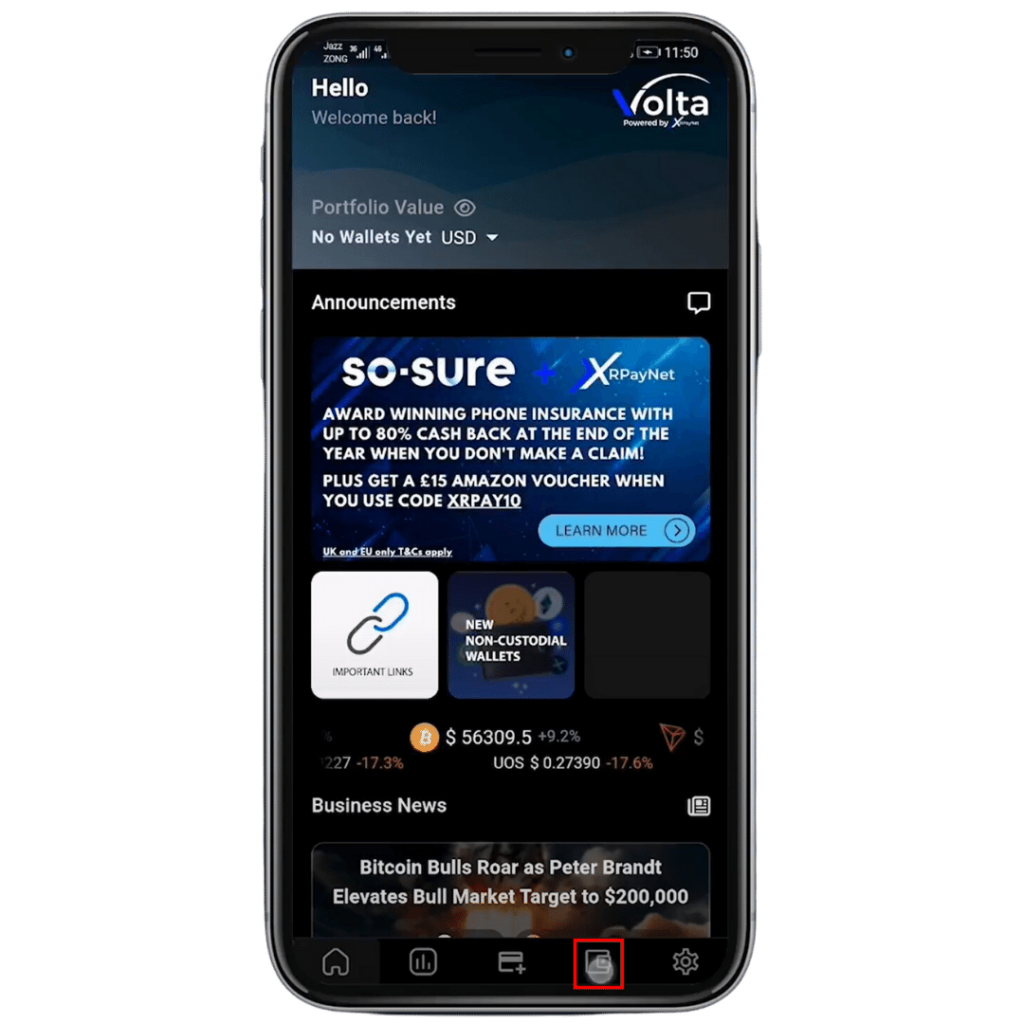
2) Click on the wallets tab
1) Download or open your Volta App
2) Click on the wallets tab
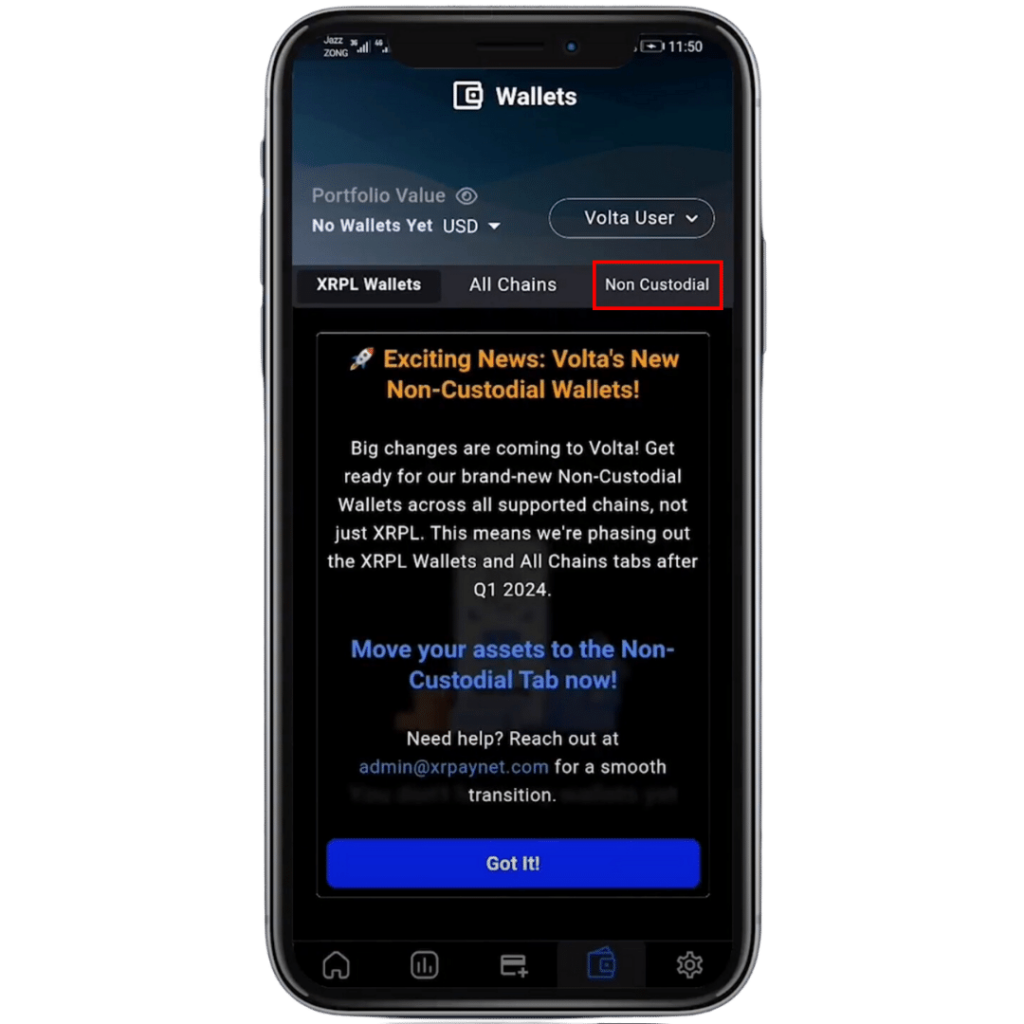
3) Navigate to Non-Custodial
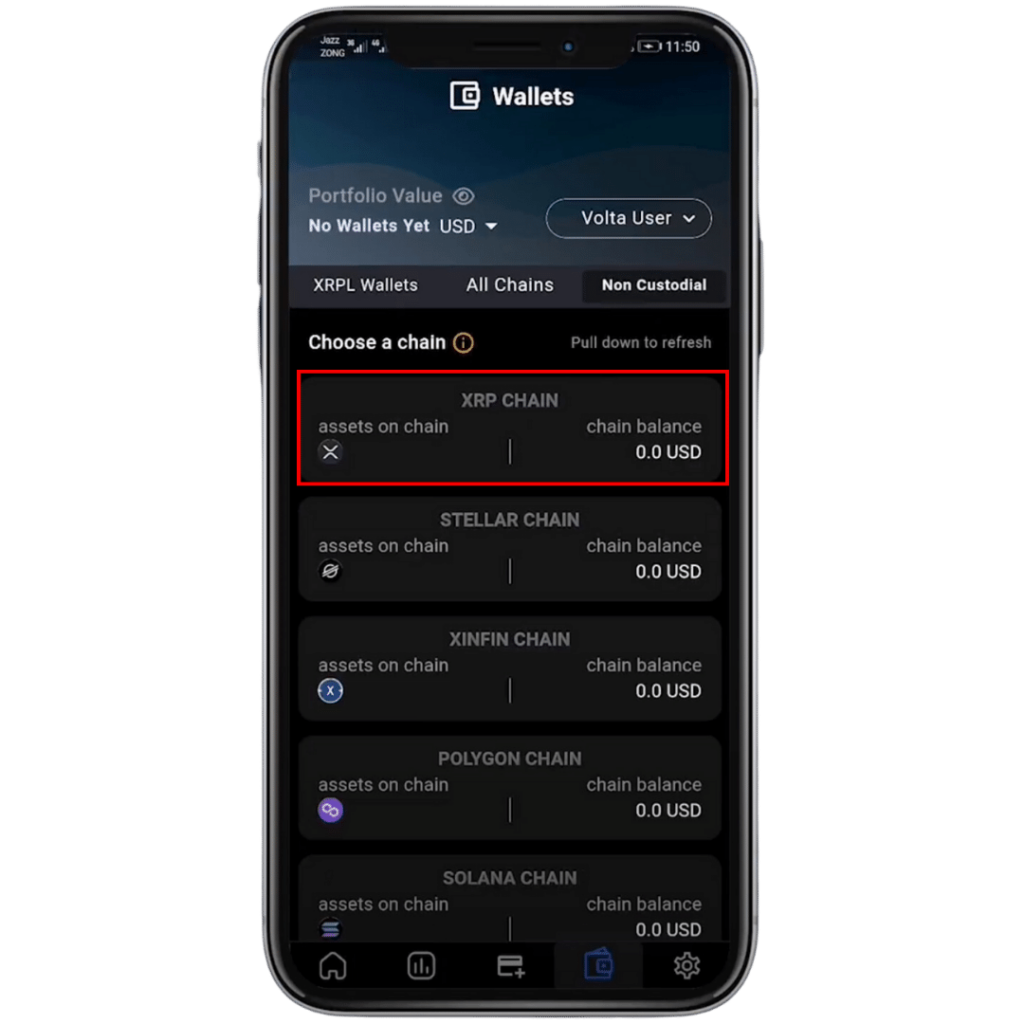
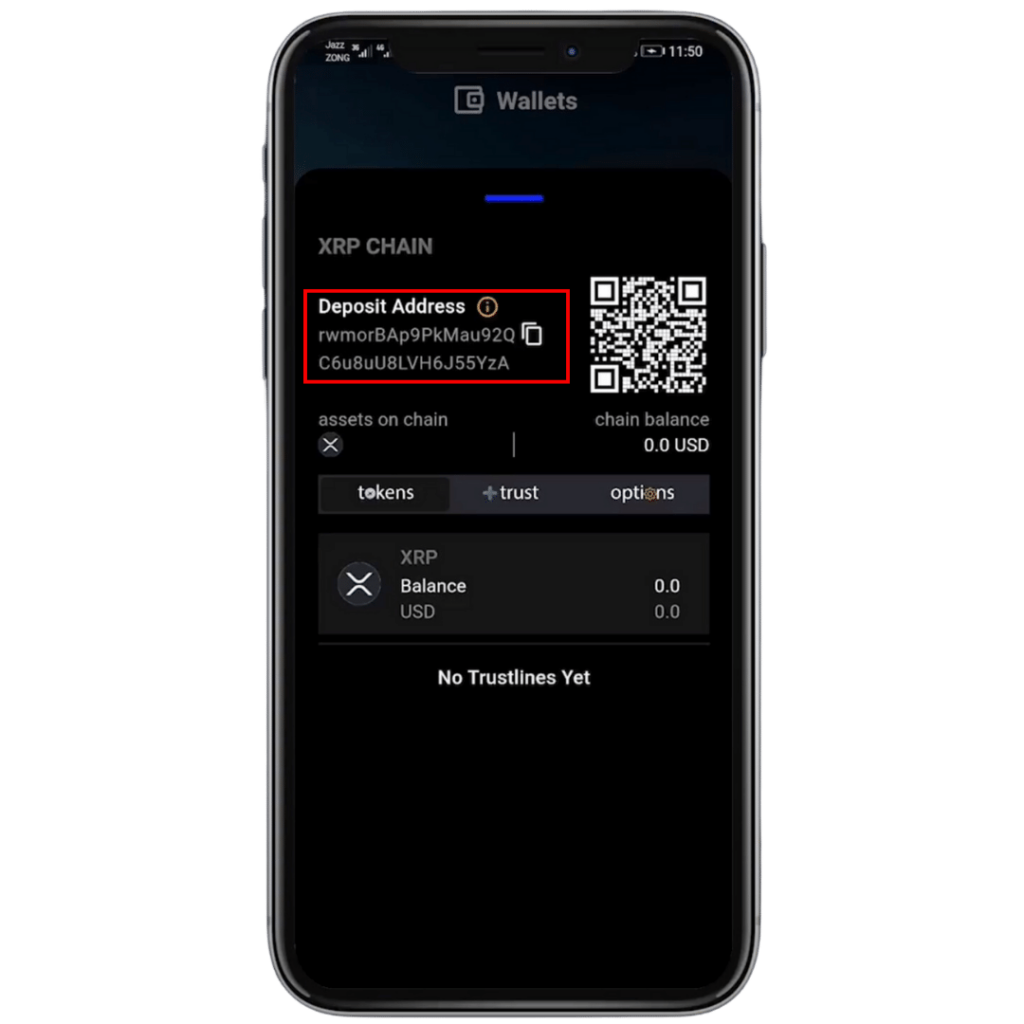
4) Click the title XRP Chain
5) Now, you will need to activate your XRP Wallet. This has a 10 XRP network fee to complete, plus you will need 2.5XRP for each TrustLine you want to set. We usually recommend that users open their accounts by sending a deposit of at least 20 XRP.
6) To activate your wallet, copy the deposit address and send a minimum 12.5 XRP to this address (10XRP for the activation and 2.5XRP for setting the TrustLine. This address does not require a tag.
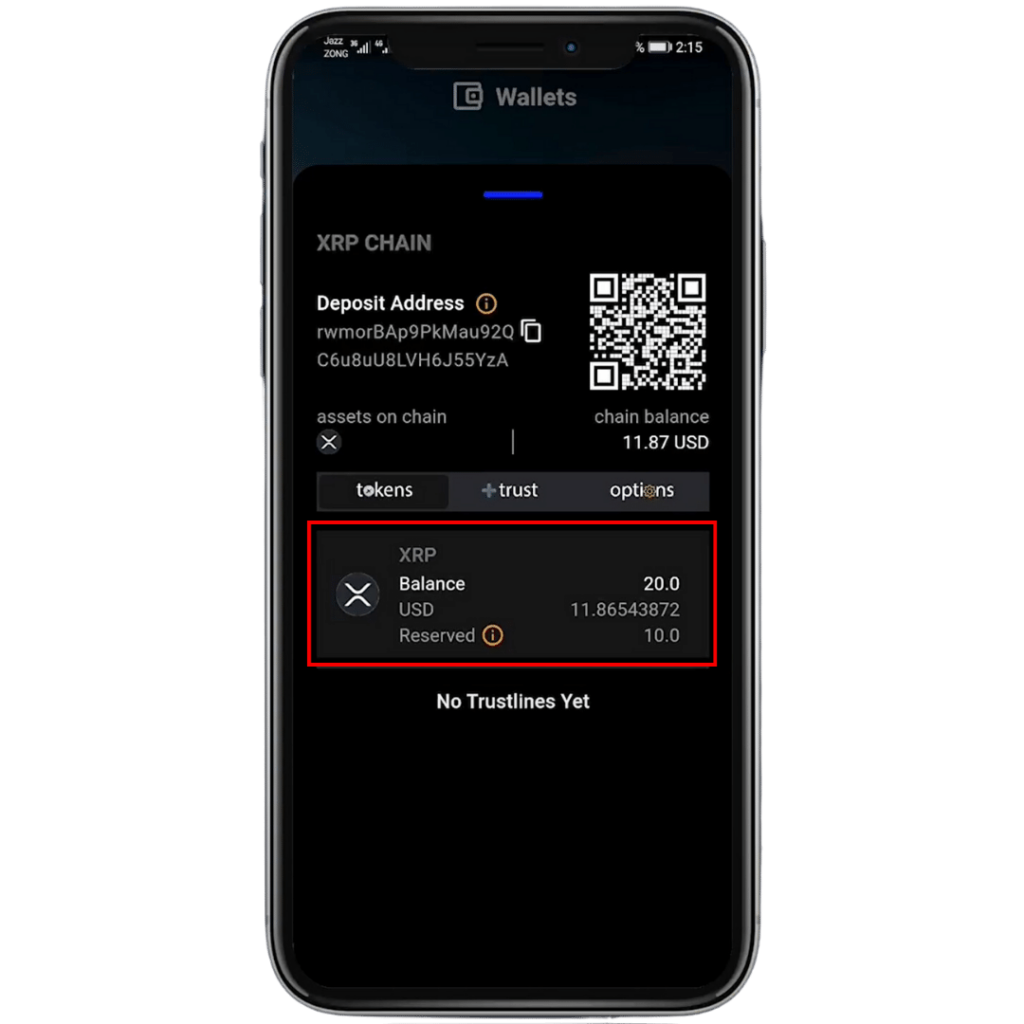
7) In this example, we are sending 30 XRP as you can see once the XRP arrives in this wallet, your XRP wallet has been successfully created, and you will see a balance of 10XRP held in reserve for this wallet. Also showing an available balance of 20 XRP. The 10 XRP reserve is is a requirement of the XRP Chain.
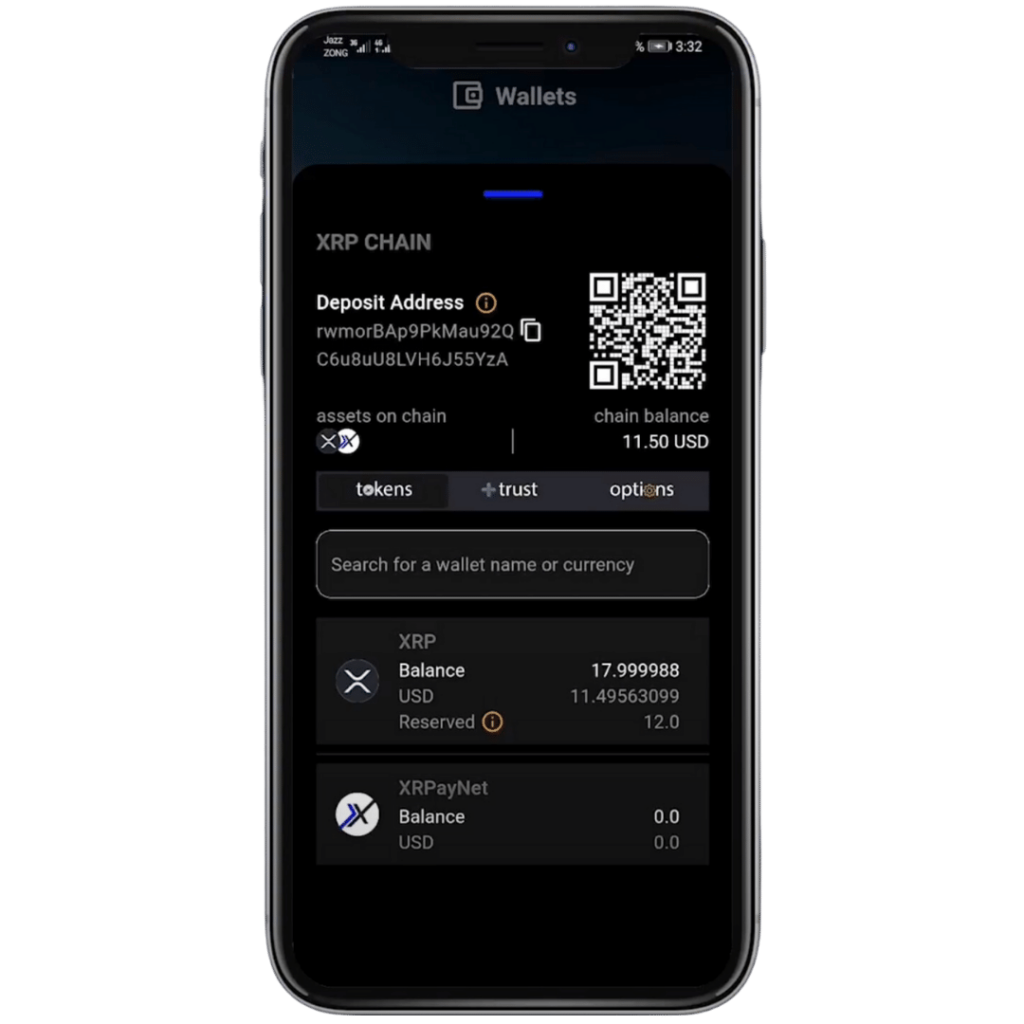
8) Now that your XRP wallet is created, to add a TrustLine, you need to have a minimum of 2.5 XRP in your wallet that is unreserved and showing on your “Balance”
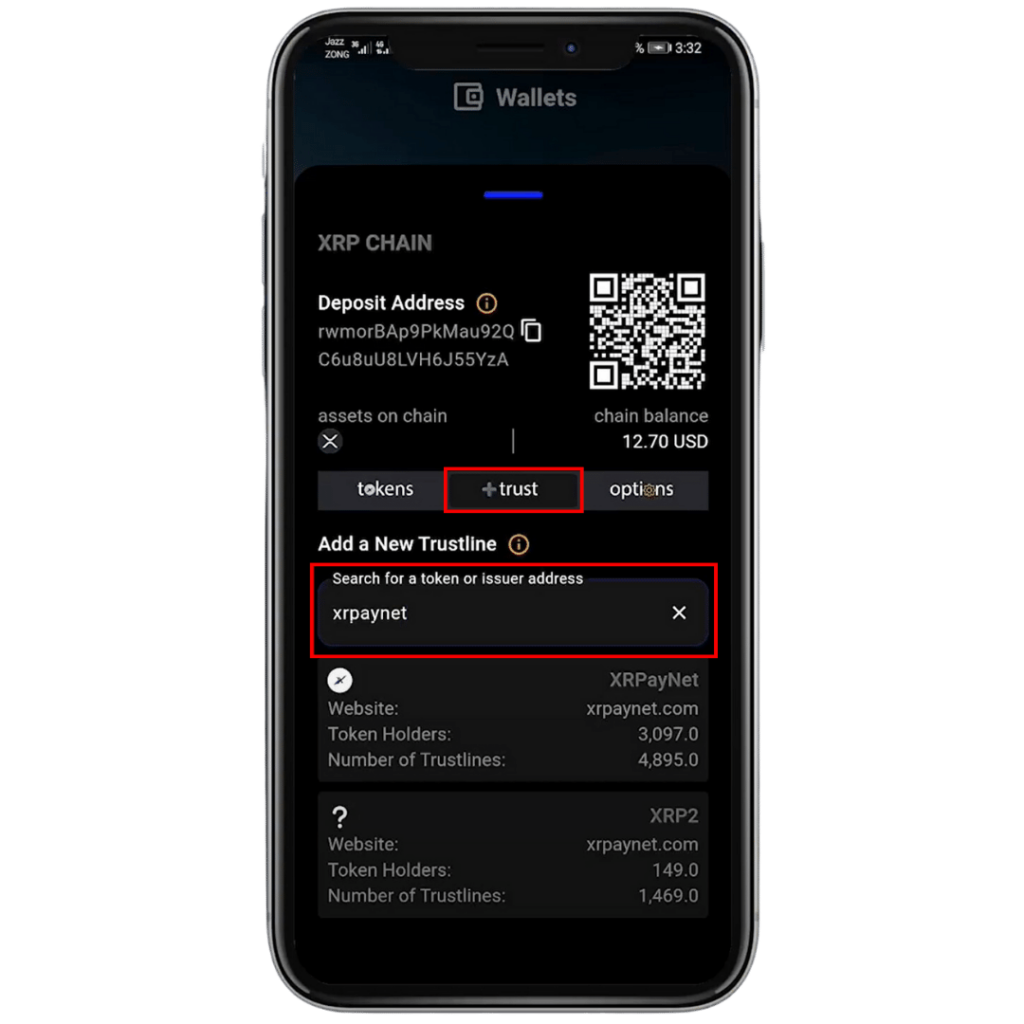
9) To search for a TrustLine, click the +trust button in your XRP Chain wallet, search for XRPayNet.
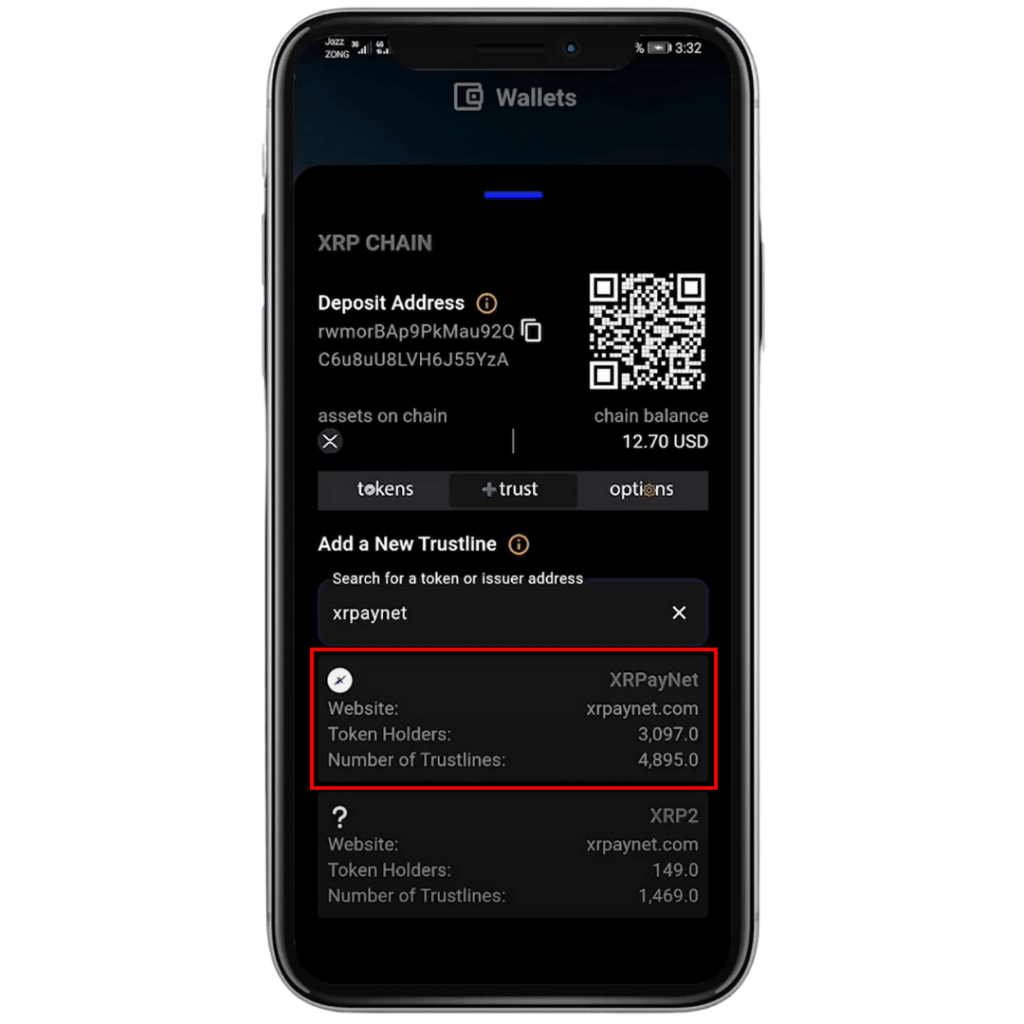
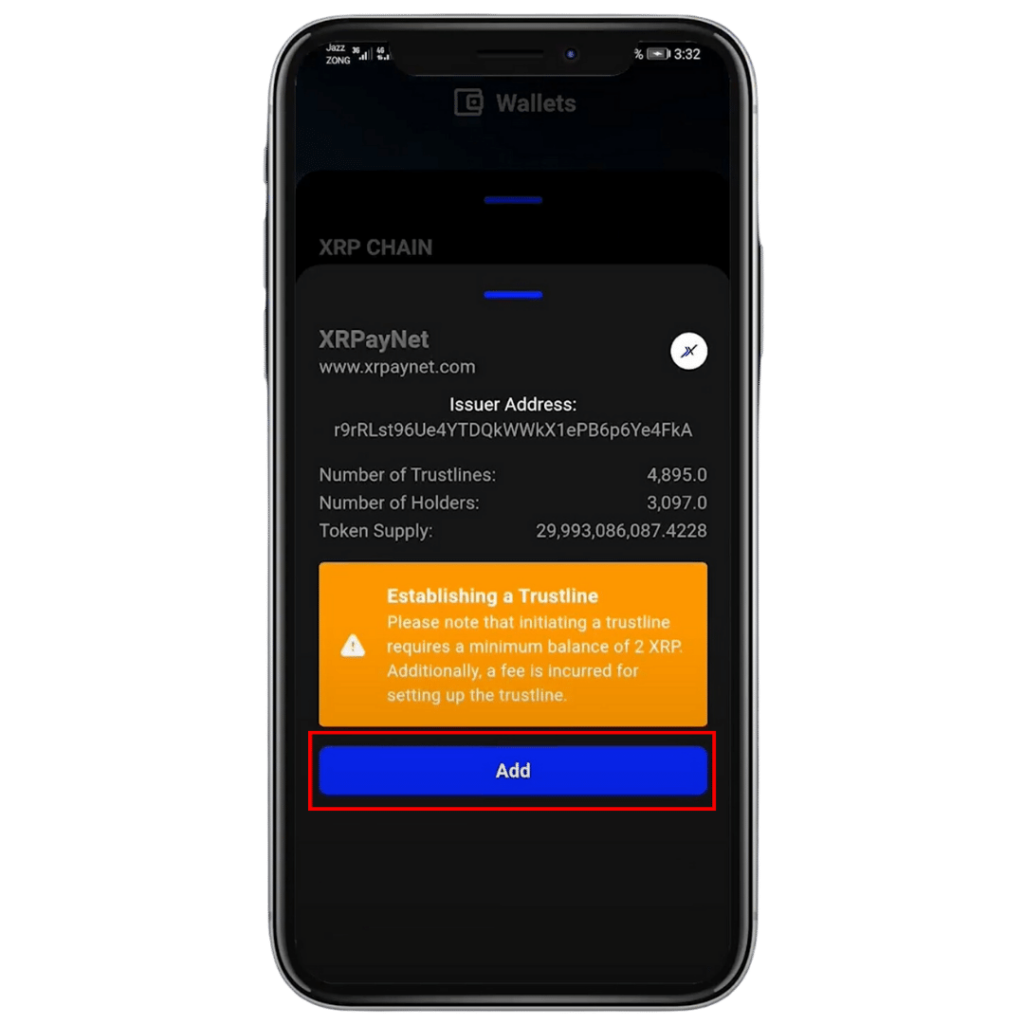
10) You will now select XRPayNet.
11) Then click “Add” to finish setting your TrustLine for XRPayNet
13) Congratulations. You have successfully created your XRP Chain non-custodial wallet and set up a TrustLine for XRPayNet with Volta